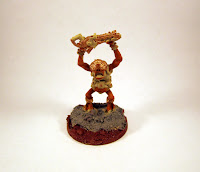
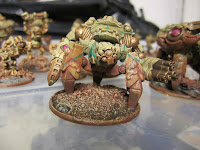
For the longest time, I've though about making a step-by-step guide to how I paint Outcasts, simple enough so that I don't like it is a chore, but detailed enough so I don't feel like I'm cheating.
Step 0:
Assemble the models, and prepare the bases. I use cork and sand to build up the base, and to cover the integrated base common with Warlord figures.
On some I've cut down the cast base, but usually I just cover with cork.
Step 1:

Foundation layers. I use Army Painter Skeleton Bone primer to cover all of the figure, touching up any missed spots with a brush later (the AP line is great like that, with bottle paint to match the primers). Then I go over the base with Vallejo Game Colour Terracotta, with VGC Ghost Grey to indicate more rocky patches.
Step 2:


Moving forward, I paint the skin with a VGC Parasite Brown, and the metal parts with VGC Bright Bronze. This will later be used to help the Quickshade provide depth to the model.
Step 3:

Using VGC Elf Flesh, with a hint of VGC Khaki if I feel adventurous, I make a coarse highlight of the skin, picking out muscles, fingers and sinews.
The base gets a drybrush of <red brown>, and parts of the still visible Skeleton Bone gets picked out with Khaki, to provide some visual interest and noticeable details.
On some models I glaze the metallics with a mix of Glaze medium, water and VGC Tinny Tin, to bring down the sheen a bit (Ghar aren't exactly know for careful equipment maintenance...)
Step 4:


Magic time! Army Painter Quickshade is used to tie it all together, using a cheap brush and some care.
Step 5:

Paint eyes, and pupils. I usually go over the feet and hands picking out the nails too, and the base gets a drybrush or two of Khaki (yes, even the grey parts). Then GW Purity Seal is applied, in two thin layers. The larger models gets Vallejo red-brown pigments applied, to symbolize dust buildup on legs and lower chassis.
Step 6:

Photograph! I've made a simple light box out of a plastic storage container and some LED spotlights.
I've added frosted plastic film to the sides (usually used for bathroom windows) to help soften the light, and everything can be stored inside the box between sessions.


No comments:
Post a Comment